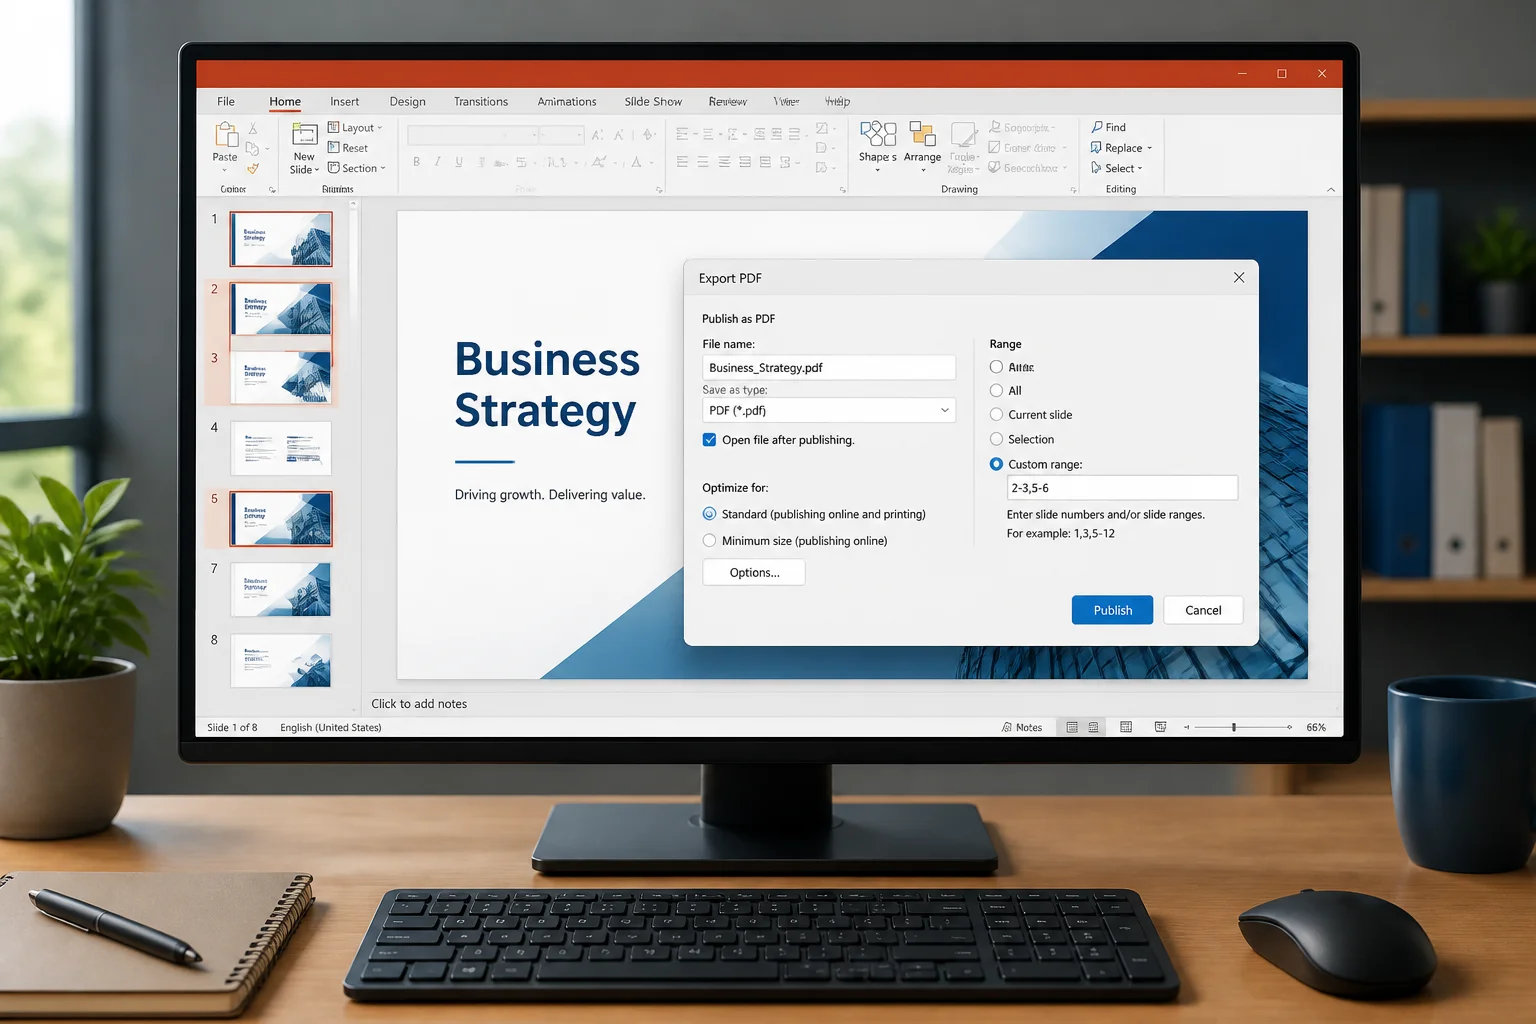
If you need to share, print, or submit only part of a presentation, you do not have to convert the entire PowerPoint file. PowerPoint can export a slide range or a list of specific slides as a PDF, and an online converter can be useful when PowerPoint is not installed.
The simplest method is to open the presentation, choose Save As or Export, select PDF, and then specify which slides to include in the PDF options. The exact labels vary slightly between Windows, Mac, and web versions.
How to convert selected PowerPoint slides to PDF on Windows
Use these steps in the desktop version of PowerPoint for Windows:
- Open your presentation in PowerPoint.
- Select File, then choose Save As or Export.
- Choose PDF as the file type. If you use Export, select Create PDF/XPS.
- Choose a file name and folder.
- Before saving, open the options available for the PDF export.
- Under the range or publishing options, select Custom range or Slides.
- Enter the slides you want to include, such as 2-5 for a continuous range or 1, 4, 7 for separate slides.
- Confirm the settings and select Publish or Save.
Open the finished PDF and check the page count, slide order, fonts, images, and any notes or handouts before sending it.
Examples of slide selections
| Slides needed | What to enter |
|---|---|
| Slides 3 through 8 | 3-8 |
| Slides 1, 5, and 10 | 1, 5, 10 |
| Slides 2 through 4 and slide 9 | 2-4, 9 |
| Only the first slide | 1 |
Use the separator shown by your PowerPoint version. A hyphen normally represents a continuous range, while commas separate individual slides or ranges.
How to export selected slides to PDF on Mac
PowerPoint for Mac can use the export workflow or the system print dialog. The export option is usually preferable because it keeps the presentation in a slide-oriented PDF.
- Open the presentation in PowerPoint for Mac.
- Go to File and choose Save As or Export.
- Set the format to PDF.
- Look for an option such as Range, From and To, or PDF options.
- Enter the first and last slide if you need a continuous range.
- Save or export the file.
If your Mac version does not provide the exact slide-selection controls in the export window, use File > Print. In the print dialog, enter the required slide range, select the PDF menu, and choose Save as PDF. Review the print settings carefully so the output uses one slide per PDF page rather than notes or handouts.
How to convert nonconsecutive PowerPoint slides to PDF

Nonconsecutive slides are slides that are not next to one another, such as slides 2, 6, and 11. There are two practical ways to create this PDF.
Method 1: Enter a list of slide numbers
If the export dialog accepts a custom range, enter the slide numbers separated by commas. For example, enter 2, 6, 11. To combine ranges and individual slides, use a format such as 2-4, 8, 12-13.
After exporting, check that the PDF contains only the requested pages and that they appear in the intended order.
Method 2: Create a temporary copy
If your version of PowerPoint only supports a continuous range, make a copy of the presentation and remove the slides you do not need from that copy. Then export the copy as a PDF.
Do not delete slides from the original file unless you have a separate backup. A temporary copy protects the full presentation and makes it easier to repeat the export later.
How to use Print to PDF for selected slides
The print workflow is useful when the normal export dialog does not provide the selection you need. It is also available in many desktop environments through a built-in PDF printer.
- Open the presentation and select File > Print.
- Choose the printer or destination that saves output as a PDF, such as Microsoft Print to PDF on Windows or Save as PDF on Mac.
- In the slide range field, choose Custom range or enter the required pages.
- Set the layout to Full Page Slides if you want each slide to occupy its own PDF page.
- Check whether the preview shows slides, notes pages, or handouts.
- Print or save the PDF, then open it to verify the result.
Printing to PDF can change the result if you select a handout layout, add a frame around slides, or include speaker notes. For a clean presentation PDF, choose the full-page slide layout.
How to select slides in PowerPoint before exporting
Some PowerPoint versions make selection easier from the thumbnail pane:
- In Normal view, select the first slide you need.
- Hold Ctrl on Windows or Command on Mac and select other nonadjacent slides.
- For a continuous group, select the first slide, hold Shift, and select the last slide.
However, selecting thumbnails does not always control the PDF export range. The export or print dialog may still require slide numbers. Treat thumbnail selection as a way to review your choices, then confirm the actual range in the PDF settings.
How to convert selected slides without PowerPoint
If PowerPoint is not installed, you can use an online presentation-to-PDF converter when you need a quick result. You can learn more about the general process in this guide to converting PowerPoint to PDF without PowerPoint.
Before uploading a presentation, check whether the service supports selecting individual slides or only converts the full file. If it converts the whole presentation, you may need to create a copy containing only the slides you want, or convert the full file and remove unwanted PDF pages afterward with a suitable PDF editor.
For a general online workflow, see the guide to converting PPTX to PDF online. Avoid uploading confidential presentations unless the service and its policies meet your requirements. You can review the site’s Privacy Policy before using an online tool.
How to preserve slide formatting in the PDF
When you export only part of a deck, the selected slides usually retain the design, images, animations as static content, and text formatting used in the original presentation. Still, check these details:
- Fonts: A missing font can change line breaks or cause text to move.
- Images: Confirm that photographs, logos, and transparent graphics appear correctly.
- Video and animation: These become static content in a PDF and cannot play.
- Links: Test important hyperlinks because their behavior can vary by export method.
- Slide size: Wide presentations may display differently when printed on standard paper.
- Hidden slides: Check whether hidden slides are excluded or included according to the export settings.
If the PDF is for printing, open the print preview before creating the file. If it is for screen sharing, review the PDF at normal zoom and confirm that small labels and text remain readable.
Why did PowerPoint export the wrong slides?
The range was entered incorrectly
Check whether you used a hyphen for a range and commas for separate slides. Also verify that the numbers refer to slide positions in the presentation, not custom labels or section names.
The file was printed as notes or handouts
Return to the print layout settings and choose Full Page Slides. Notes pages and handouts can create a PDF that contains extra text or multiple slides on one page.
The PDF contains a hidden slide
Review the hidden-slide settings and the selected range. If necessary, temporarily unhide or remove unwanted slides in a copy of the presentation, then export again.
The slides appear in the wrong order
Check the order of slide numbers in the custom range. If the export tool sorts pages automatically, a temporary presentation containing only the required slides may give you more control.
The PDF looks different from the presentation
Compare the PDF with the original in Slide Show view and inspect fonts, cropped images, charts, and text boxes. Replacing unavailable fonts or exporting from the desktop application may resolve layout differences.
Should you export selected slides or delete pages afterward?
Exporting only the required slides is generally the cleaner approach because it avoids creating a PDF containing material you did not intend to share. It also reduces the chance of accidentally leaving confidential or unfinished slides in the file.
Removing pages after a full export can be useful when the presentation tool does not support nonconsecutive selections. If you use that approach, check the final PDF for page numbering, bookmarks, links, and leftover pages before sharing it.
Final checklist before sending the PDF
- Confirm that every requested slide is present.
- Confirm that no unwanted slides are included.
- Check the order of the pages.
- Open the PDF on another device or viewer if the file is important.
- Inspect fonts, images, charts, and hyperlinks.
- Make sure the file name does not reveal confidential information.
- Print a test page if the PDF will be submitted as a physical document.
For a full-deck conversion workflow, you can also use the site’s PPT to PDF converter guide. The key point is to confirm the slide range before saving and to inspect the finished PDF rather than assuming the export worked correctly.
Related: How to Convert a PowerPoint With Mixed Slide Sizes to PDF Without Unexpected Scaling
Related: How to Remove Hidden Slides, Off-Slide Objects, and Unwanted Content Before PDF Export
Related: How to Convert PowerPoint Slides Into a PDF With a Clickable Table of Contents
Related: How to Convert a PowerPoint Presentation for Screen Readers When Export Settings Are Limited
Related: How to Convert a PowerPoint Deck Into a PDF With Page Numbers and Section Labels